
You have probably landed here because you are wondering what the heck is Github, You have heard your friends, colleagues, co-workers, etc… talking about Github and the beauty of it but you are not sure what is it.
Well in this post I will take you through what really Github is and also show you how to use it.
If you prefer to watch a video then you can watch my YouTube video here
[YOUTUBE VIDEO WILL BE HERE]
Git
You probably won’t understand Github if you don’t actually know what git is. Git is simply an open-source version control system taht was started by Linus Trovalds. Git is similar to other version control systems such as, Apache Subversion, Mercurial, Fossil to name a few.
Version control systems
So now you understand briefly what git is. But what does version control system really mean?
As a developer you are constantly making new applications and revising them all the time; However, sometimes you don’t want to lose the previous change or you want to keep track of what have you changed.
Version control systems help you as a developer to keep track of those revisions and store the modifications in a central repository. This will allow not only you keeping track but also if you have a team of developers to easily collaborate, as each developer can download his/her own copy of the code, make changes and re-upload them and everyone will get the new copy.
Such a tool allows for developers from all over the world to collaborate and to build and to contribute to a project without the need to even see each other.
Additionally, this gets even better. Even people who have nothing to do with the development of the project can still download and use the project on their own with following the appropriate license. Guess what? Even those who has nothing to do with development or coding can still contribute by reporting errors, bugs, suggestions, etc… to the developers!
Github
So now we have explained the first part of “Github” and that is the “git” but what about the “Hub”? well the hub is only a tool that allow users to use git. In other words Git revolves around the hub which is also known as GitHub.com. On GitHub developers are able to store their projects and also network with other developers/people who share same mind set.
Now GitHub includes multiple terminologies that we need to understand before moving on. Let’s start of by understanding the word “Repository”. Keep in mind, we will dig even deeper in each terminology once we start working with github
Repository
A repository, also known as “repo” is the location where all the files for a project are being stored. Every project will have its own repo and its own unique URL to access it.
Clone
After creating your first repository, you want to some how get it on your machine and make changes to it, this is called “Clone”. You clone your online repository into your local machine to make changes to it.
Push
You made your changes and you are ready to merge your local changes with your original repository, this is called “Push”. You push your changes to the online repository.
UpStream
For some people this might be a little bit difficult to understand at first, or without actually practicing it. To put it in simple words, upstream is the original repository of a project. If it doesn’t make sense then it’s fine, I bet you will understand it later on.
Fork
Forking is a way for developers to make a copy of someone’s repository (Upstream). so now you are the owner of this copy and you can start making changes to your own copy and not to the original copy aka. repo.
Pull Request
After forking a repository and making changes to it, you want your changes to be merged to the original repo (upstream). Now you need to send a “Pull Request” to the owner explaining the changes you have made. Github provides great way for you and the author of the official repo to communicate.
Flow Diagram
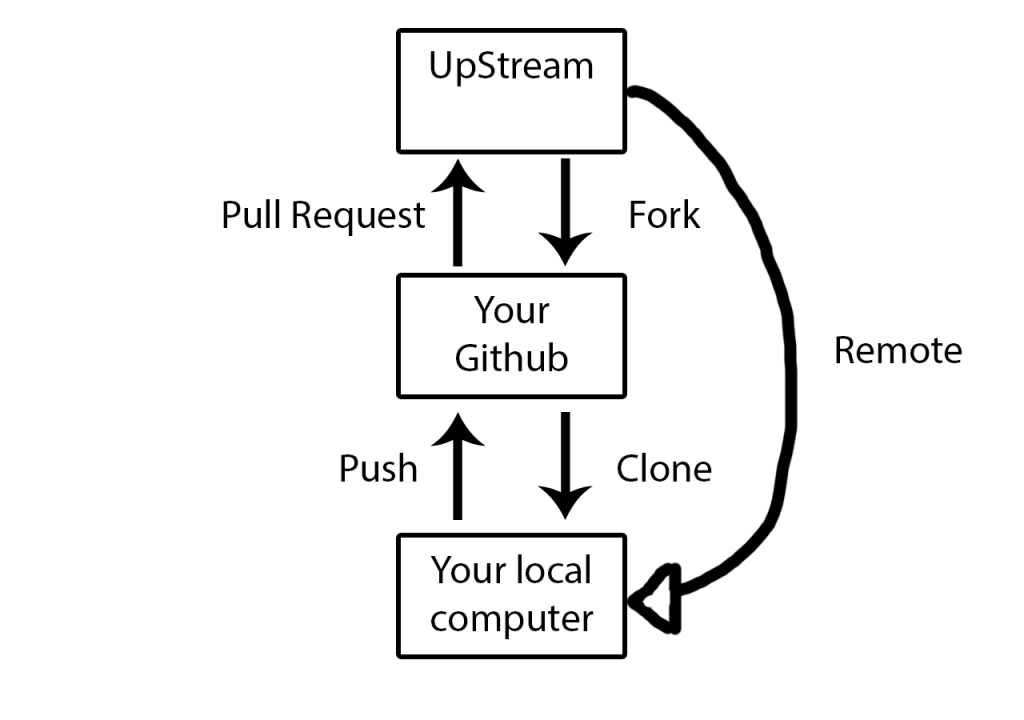
If you should take out anything from this article then it should be this diagram.
I will explain the above diagram by creating a simple scenario – I want to create a story; However, I also want to include the story of someone who made their story available for the public for reuse. Simple scenario but will get us to where we want to go.
Step 1
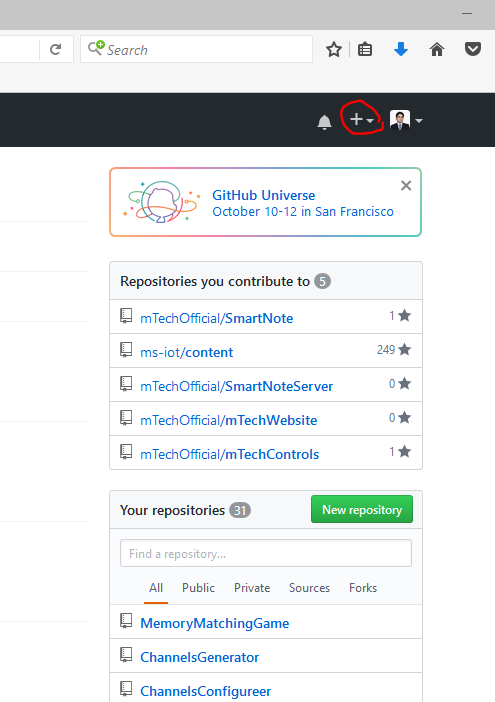
The very first step is I would head up to my GitHub account, and then click on the plus sign on the top right corner. This will get us going with creating our own repository.
Step 2
Select “New Repository”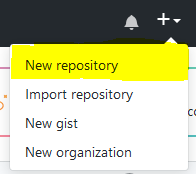
Step 3
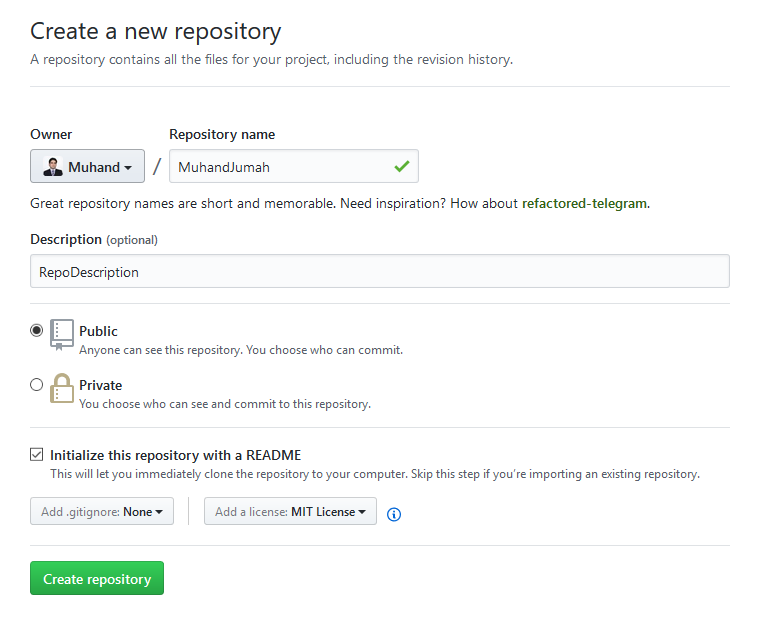
Now you have to fill your repository information, under “Repository name” add the project name, in this case i will call it “MuhandJumah”.
For Description just add a description to your repository, keep in mind it’s optional.
Then choose whether this repository is public, meaning anyone can see it or private, no one can see it but you – Keep in mind private will cost you some money unless you are a student.
The majority of repositories are created with a README file, this file will contain general information about your repository, check out README-Template.md for a good README template.
As far as .gitignore, we will talk about it in future posts.
License, choose the license that best fit your project, if you are not sure then click on the information icon next to it and it will give you brief description of the different licenses.
Now click on “Create repository” and congratulations your new repository is created.
Step 4
Upon completing step 3 we have already finished with the middle rectangle of our flow diagram. We have created our repository on our github. In step 4 we need to clone this repository into our own machine and make changes and then push them back up into the repository.
In order for us to be able to clone the repository we can do it in multiple ways,
- Use git for windows and this can be downloaded from here
- Use terminal if you are on MAC or Linux – both of these systems already have git installed on them
Since I am on my windows machine then i will go with 1 but the same should apply if you were to do it with 2.
After downloading and installing git we need to configure it to connect to our github account.
First of all open GitBash.
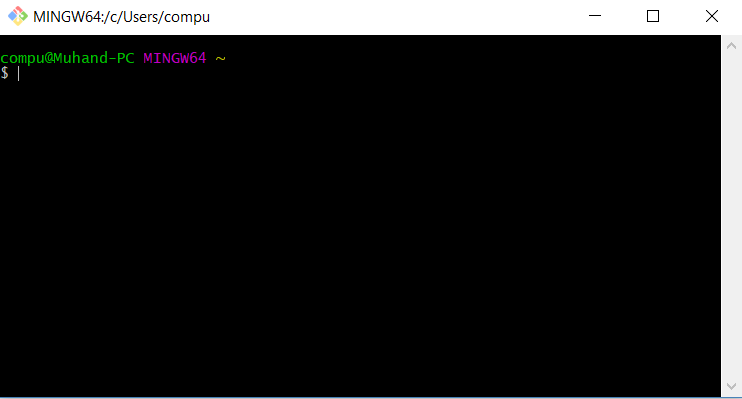
To configure it we simple need to set up our username, do this with the following command
|
1 |
git config --global user.name "<em>xyz</em>" |
Make sure to change the user.name to your original name
Confirm the name is set by running
|
1 |
git config --global user.name |
Now we need to configure the email by doing
|
1 |
git config --global user.email "email@example.com" |
You can similarly confirm by running
|
1 |
git config --global user.email |
Now you are all set and ready to clone, in order to clone go back to your repository click on “Clone or download” and copy the URL
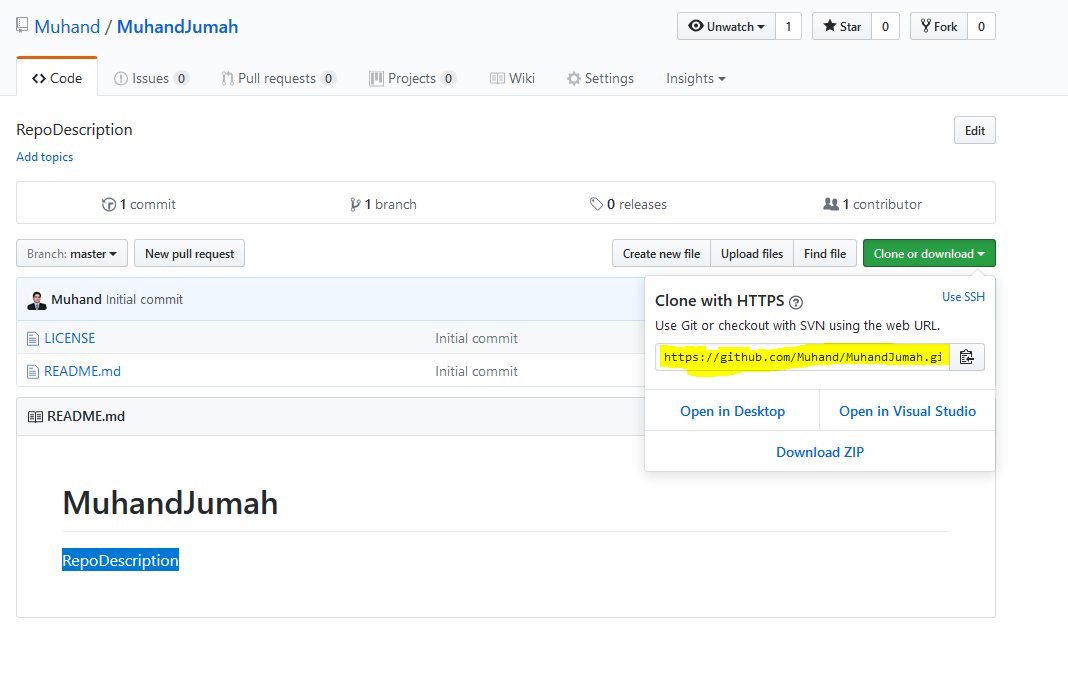
Going back to Gitbash, start by navigating to where you would like to clone the repo, in my case I want it to be in my github folder on my D: drive.
|
1 2 |
cd d: cd github |
Now I need to clone by running the git clone command
|
1 |
git clone https://github.com/Muhand/MuhandJumah.git |
After cloning the repository you can now change directory to it by typing
|
1 |
cd MuhandJumah |
Keep in mind to change “MuhandJumah” to your repository name.
Step 5
We have finally cloned our repository and we have made changes to our project source code and added files to the folder as we wished. Now we are ready to push those changes back to our repository and make them available to the public to see.
In order to push our changes we can first check git can actually detect our changes, and you can do this by running git status
|
1 |
git status |
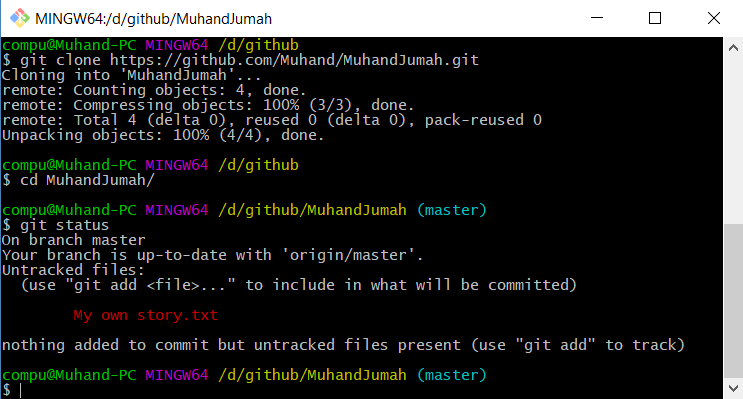
After running git status we can see Gitbash returning “My own story.txt” it noticed that there was a new file added to the directory called “My own story.txt” and I am happy with this change, now need to push it.
Before pushing we need to prepare those files to be pushed, running “git add .” will do the job
|
1 |
git add . |
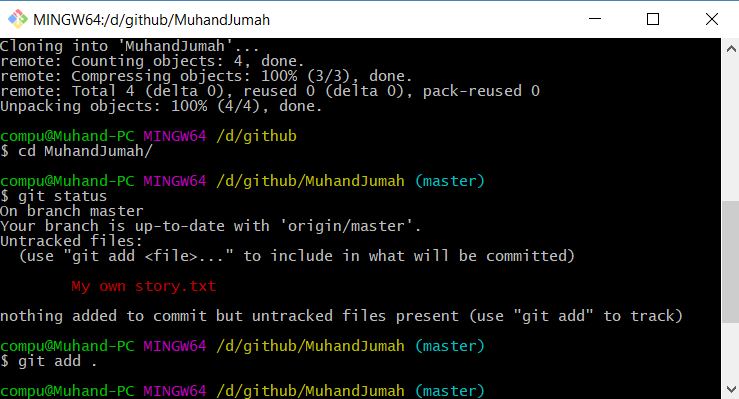
The “.” says to prepare all changes to be pushed. You can change the “.” to specific files.
You can confirm these changes by running git status, again.
|
1 |
git status |
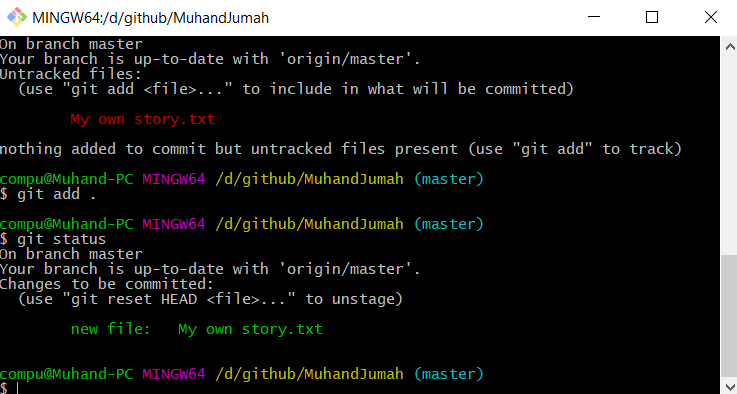
You can notice it became green, meaning it’s ready.
Now that this is done we need to write a message explaining the changes we have made.
We can do this by writing,
|
1 |
git commit -m "Added my new story file" |
The flag -m, means the message we want to add for this change. We can not commit without adding a message.

Finally, now we are ready to push our changes by typing git push
|
1 |
git push |
This might prompt you with github login system, just simply enter your github username and password and hit login
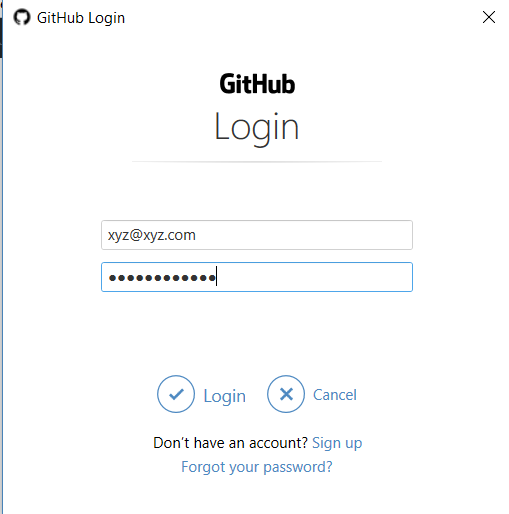
Now you should see a message saying your push was successful.

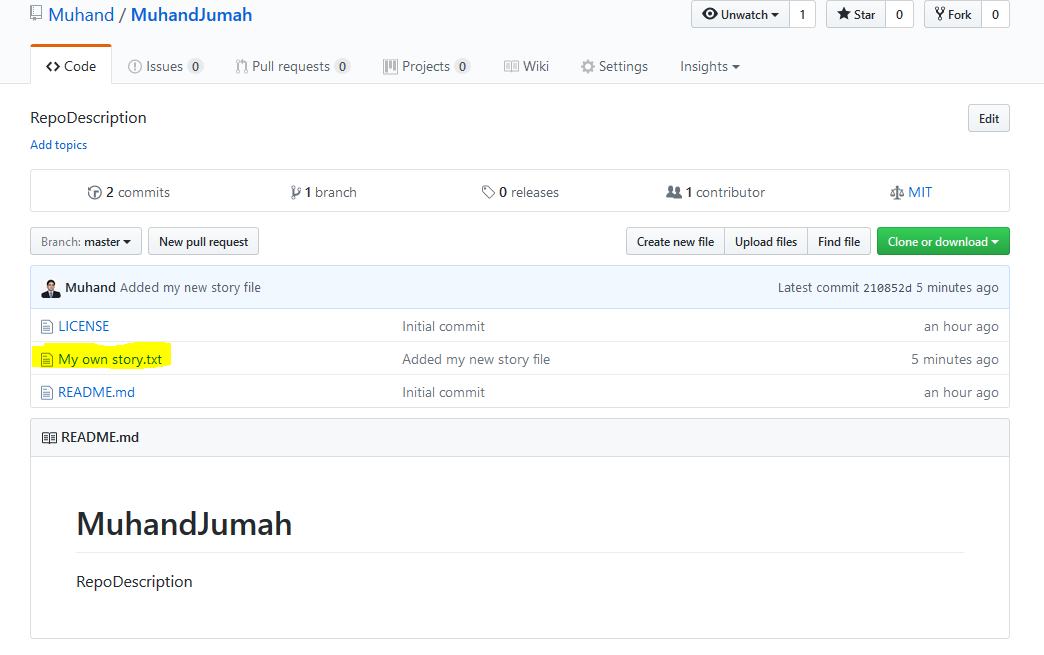
Going back to your repo, you will see the new changes
Step 6
Upon completing step 5 & step 4 you have successfully finished the lower rectangle of the diagram, we were able to create or repository and make changes and push it back.
In this step we will learn to borrow someone’s repository to make our project even better.
To be continued…
Also published on Medium.